Integrating Checkflo with QuickBooks Guide
Integration Guide for QuickBooks Online
This guide will walk you through the steps to connect your QuickBooks Online account to the Checkflo app. By syncing Checkflo with QuickBooks, you can import check payments, streamline your check processing, and reduce administrative work. With Checkflo, you’ll save time and money while improving operational efficiency.
To get started, ensure you have a valid QuickBooks Online account.
Video Tutorial
Step by step guide
Step 1: Sign Up on Checkflo
Visit www.checkflo.com, click “Sign Up” on the top right, and then click on the “Connect to QuickBooks” option.
Step 2: Authorize Data Sharing
Authorize QuickBooks to securely share the necessary data with Checkflo.

Step 3: Complete Checkflo Sign-Up Form
Fill in the necessary information, agree to the terms and conditions, and then submit the form.

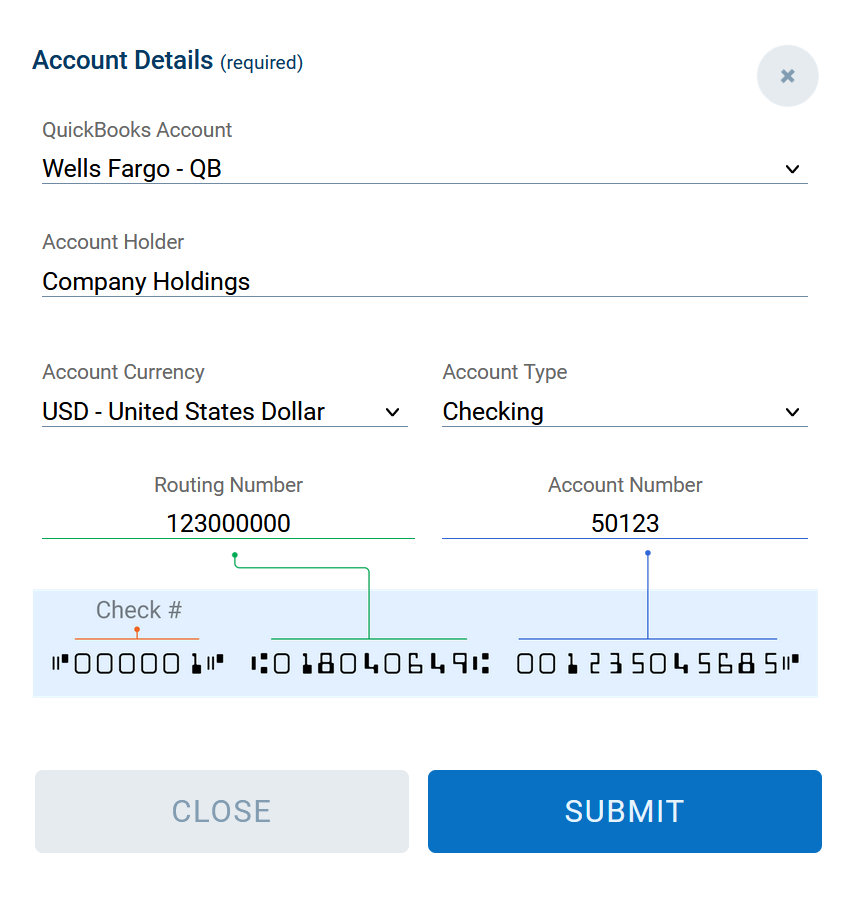
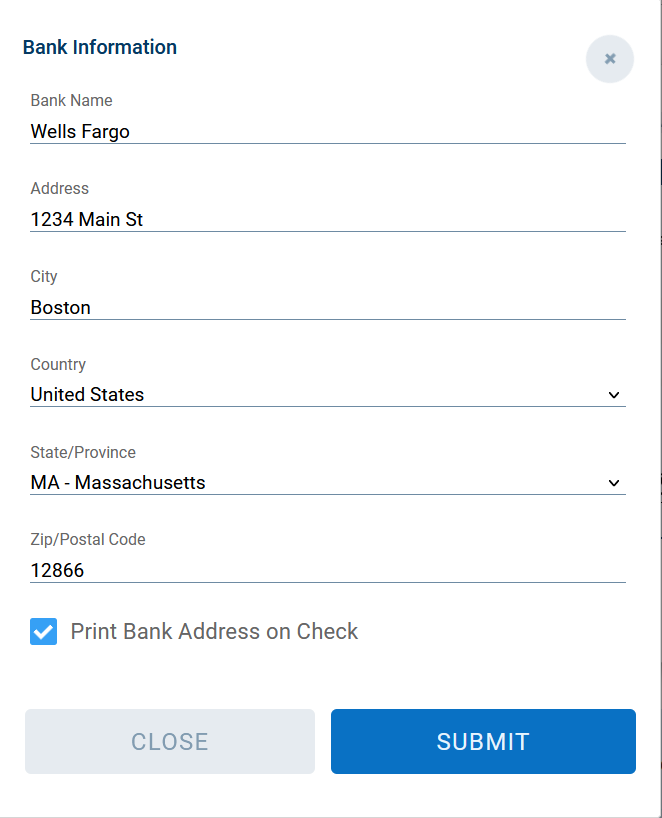
Step 4: Add Bank Account Information
Enter your company’s bank account information, including account holder’s name, bank name, and bank address that is associated to your QuickBooks account.

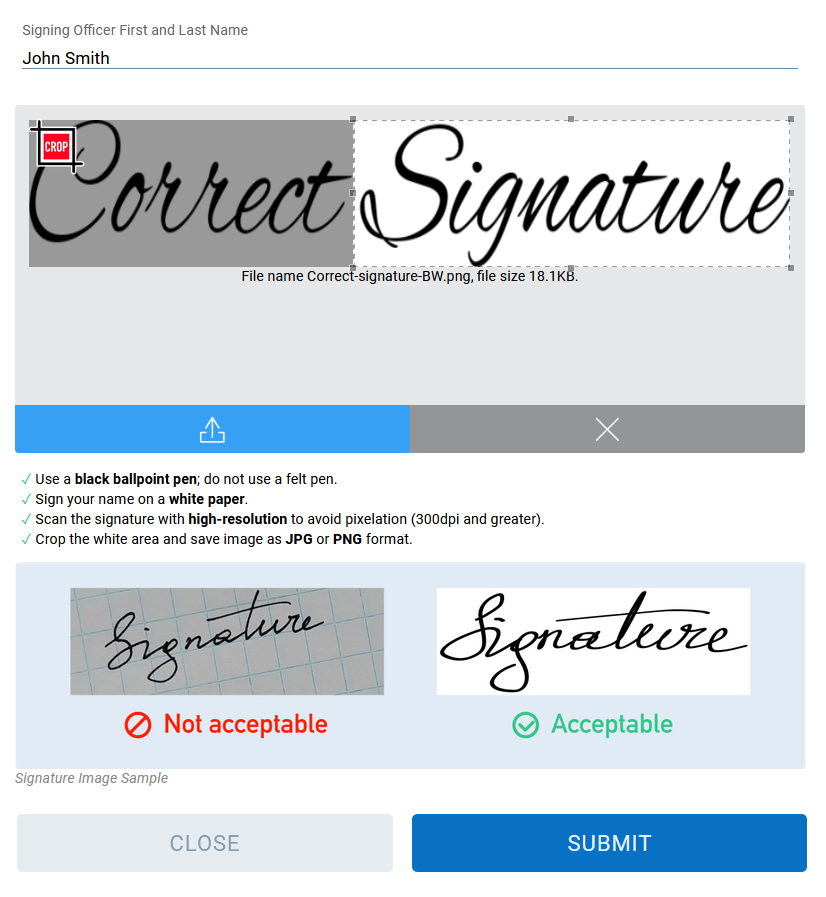
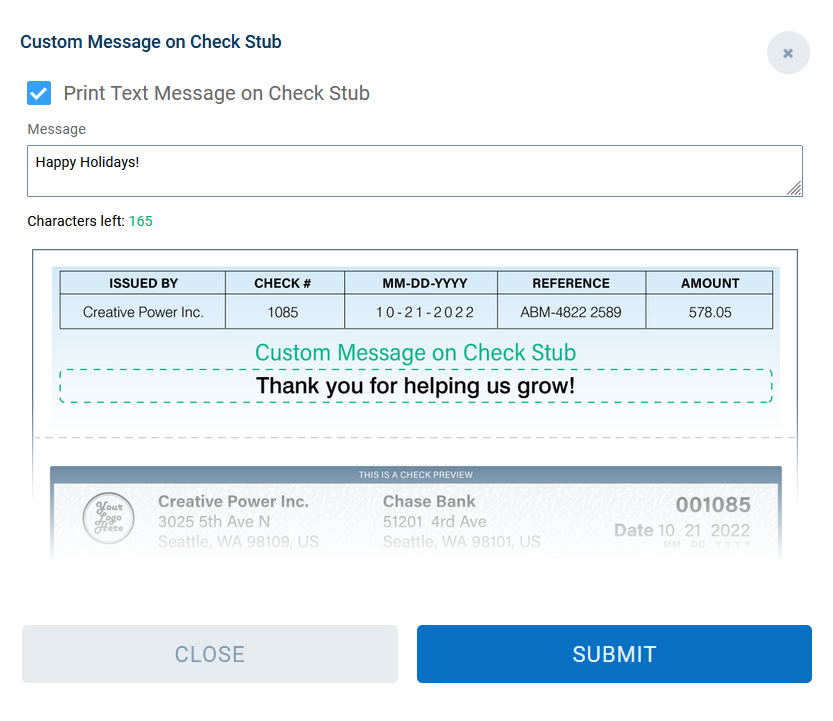
Step 5: Customize Check Settings
Customize your check settings by providing the following information:
- Bank Information (Required): Routing Number and Account Number
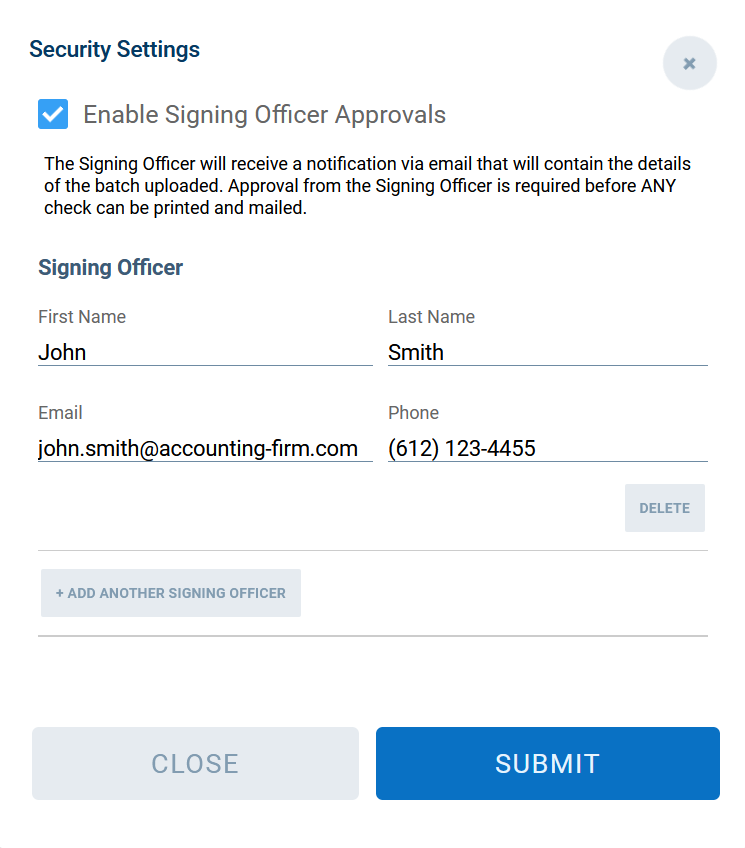
- Signature of the Signing Officer (Required)
- Company Logo on Bank Check (Optional)
- Custom Message on Check Stub (Optional)
- Signing Officer Approval for Enhanced Security (Optional)
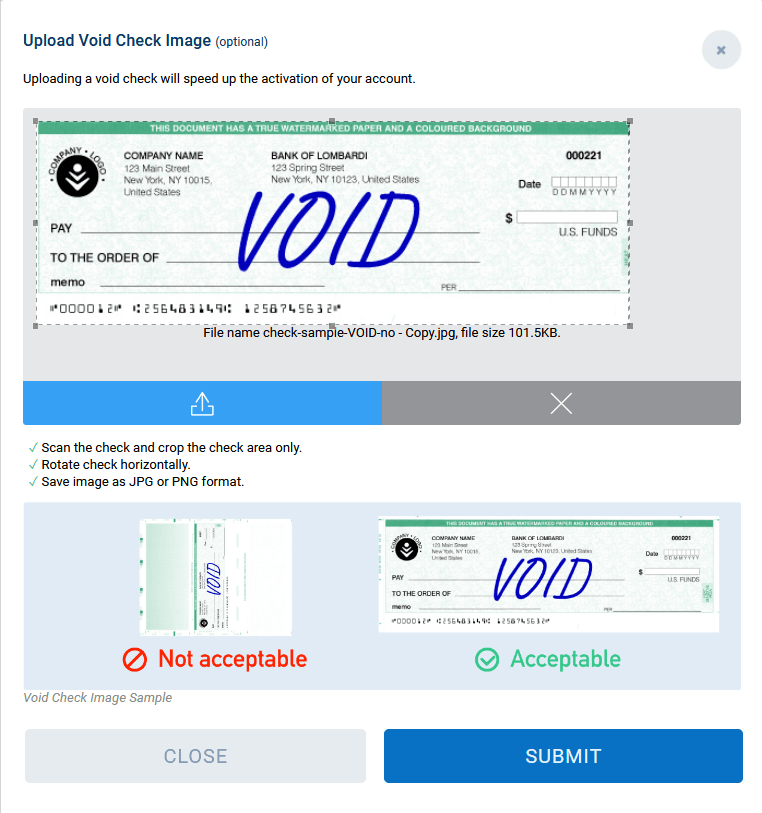
- Void Check Image (Optional)
Step 6: Review and Activate Account
Confirm the information on the dummy check displayed is correct before activating your account. Once activated, Checkflo will review your information and notify you via email when your account is approved.


Step 7: Import Checks from QuickBooks
To import check payments from QuickBooks to Checkflo, hover over the QuickBooks drop-down on the top left and select “Import Checks.”

On this page, you can select the date range for the checks you want to print and choose the bank account from which the payments will be withdrawn.

After importing the checks from QuickBooks, you can select which ones to print, choose a delivery method such as USPS or FedEx, and then click “Submit to Process”.
