Instructions on how to import checks from QuickBooks
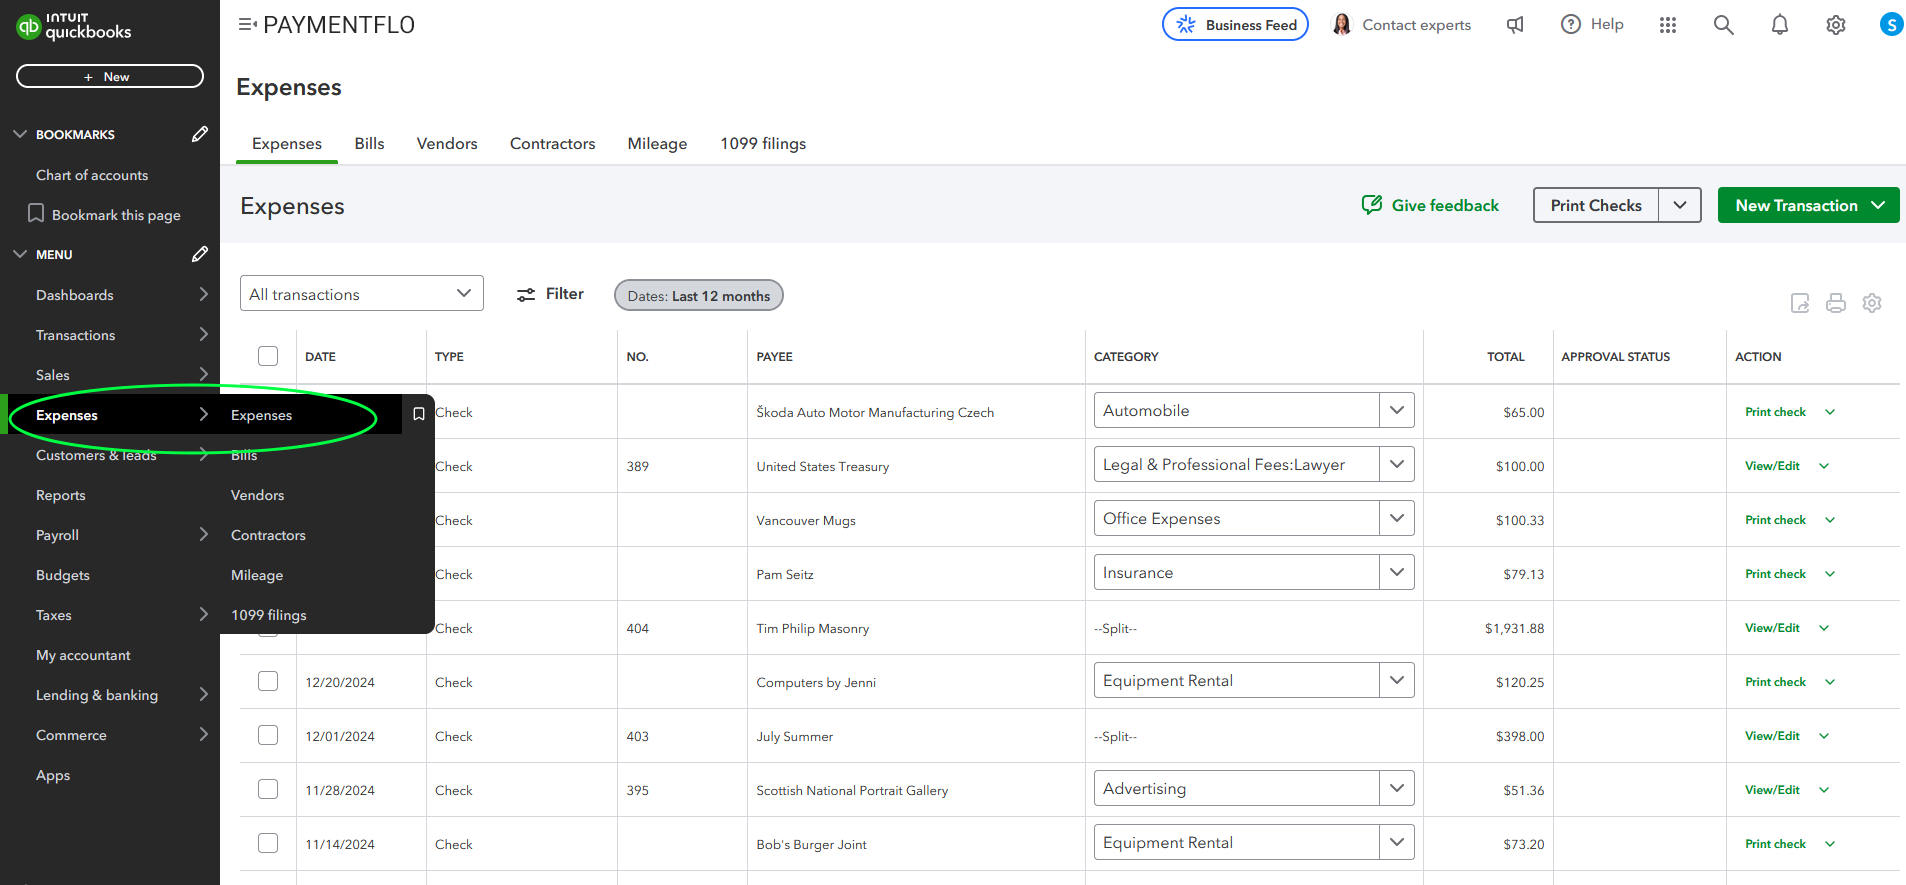
Step 1: Access Expenses in QuickBooks Online
Log in to your QuickBooks Online account and click on the “Expenses” tab in the left menu.
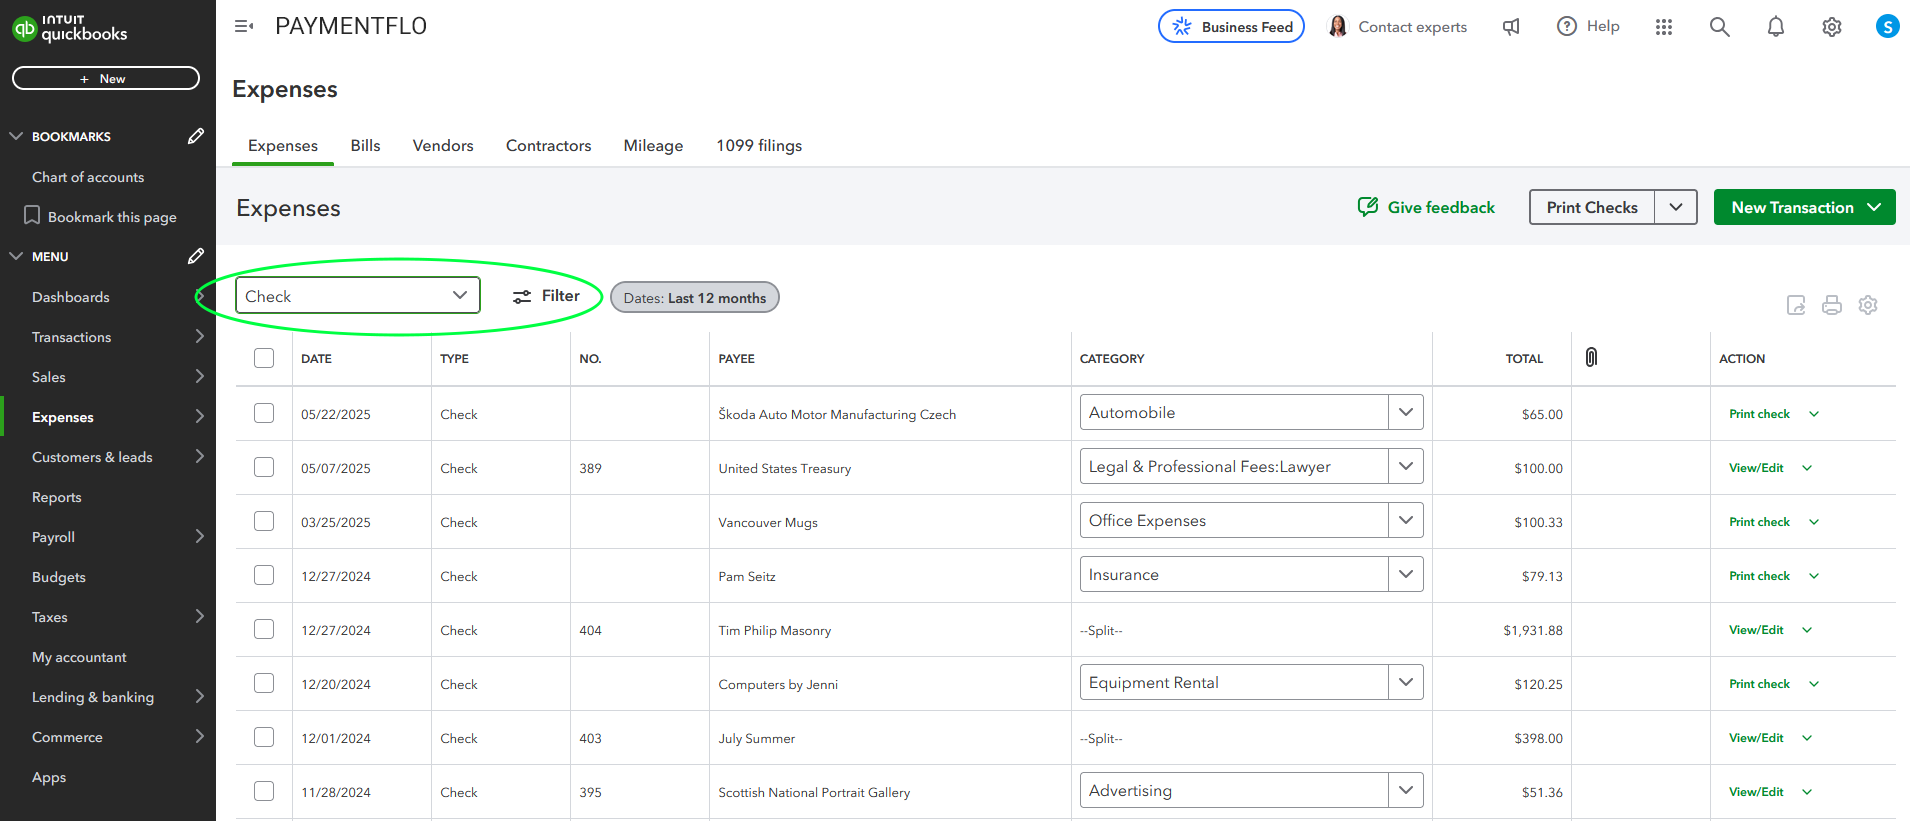
Step 2: Filter Check Expenses
On the Expenses screen, click on the filter tab to display only check expenses, and then select a check expense.
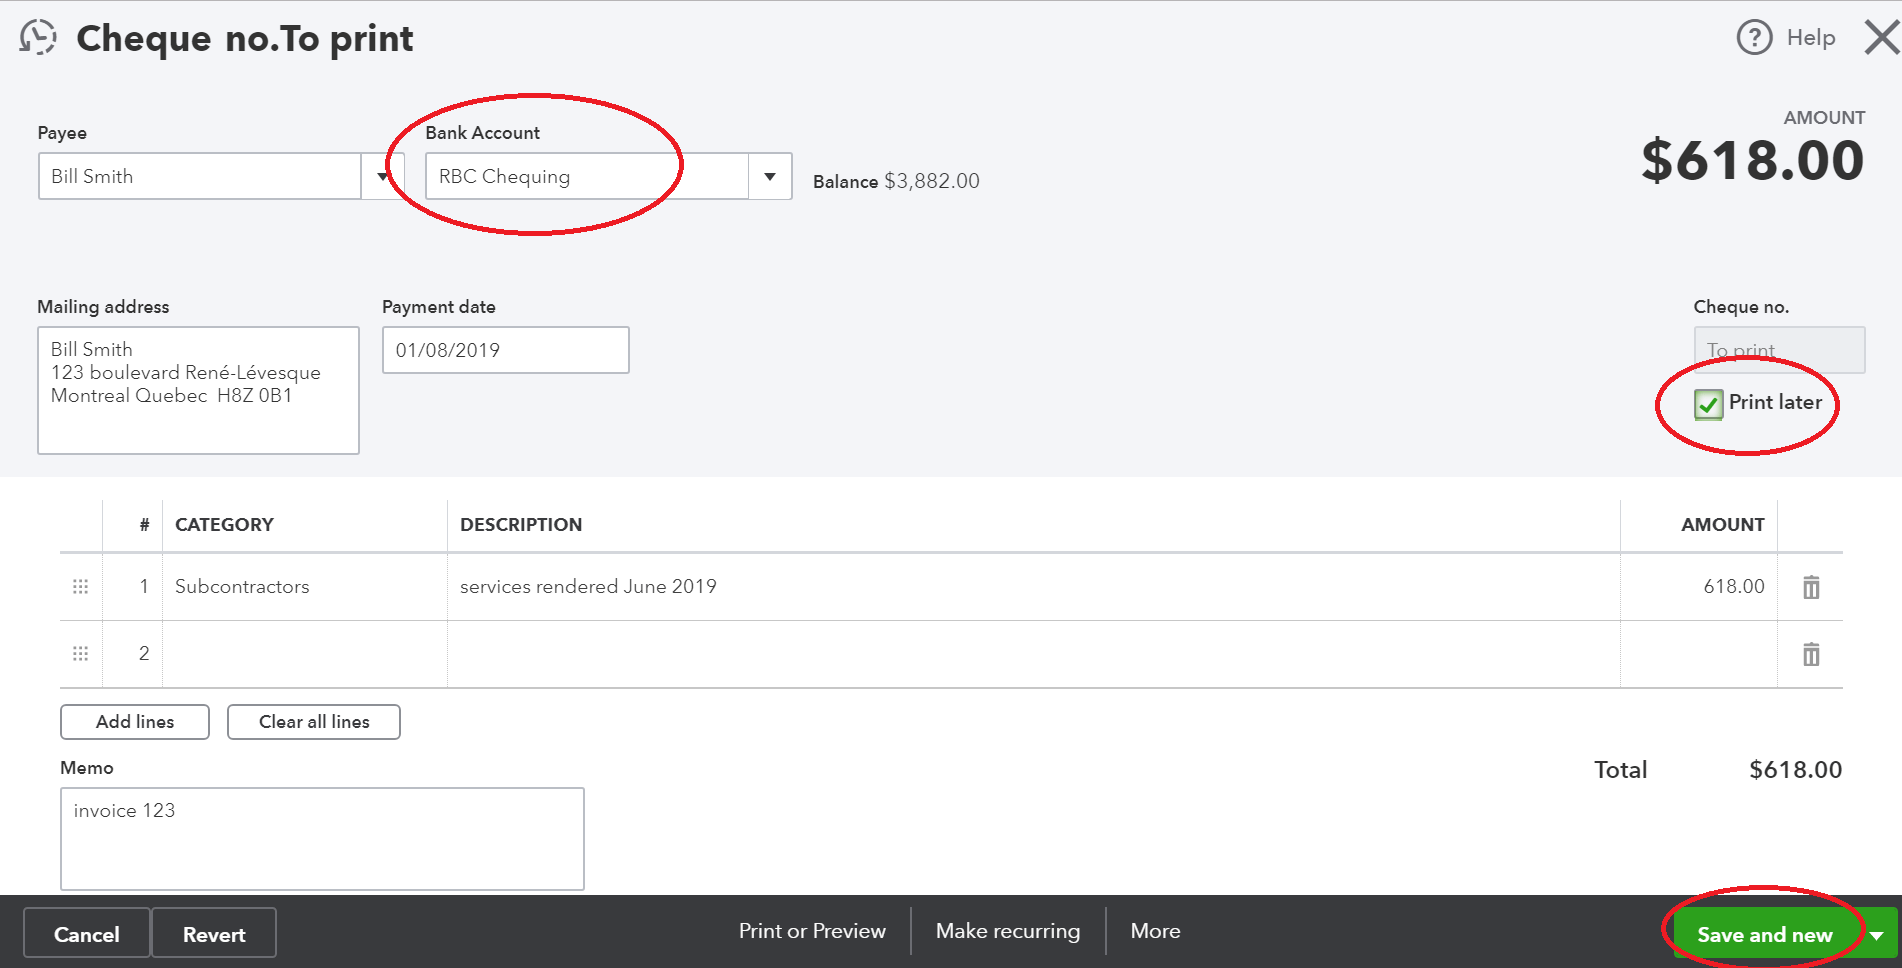
Step 3: Set Checks to ” Print Later”
After selecting a check expense, complete the following steps:
- Choose the appropriate bank account for paying the check expense.
- Select the “Print Later” option under the check number on the right side.
- Click “Save and Close” in the bottom right corner.
Repeat this process for each check you want Checkflo to print and mail.
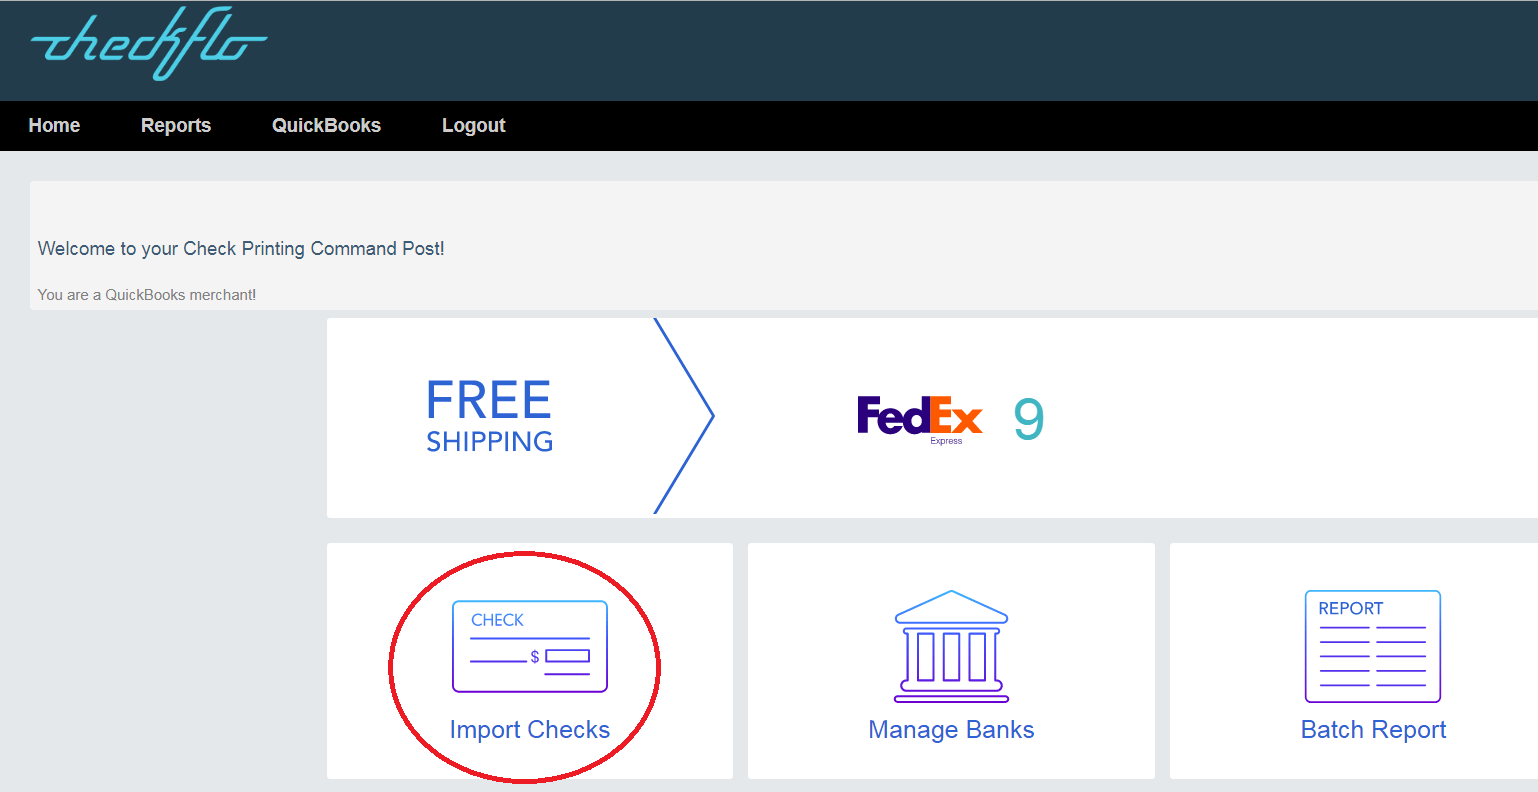
Step 4: Import Checks in Checkflo
Log in to your Checkflo account and click on the “Import Checks” option, either from the Dashboard or the Main Menu (QuickBooks > Import Checks).
Dashboard > Import Checks
or
Main Menu: QuickBooks > Import Checks
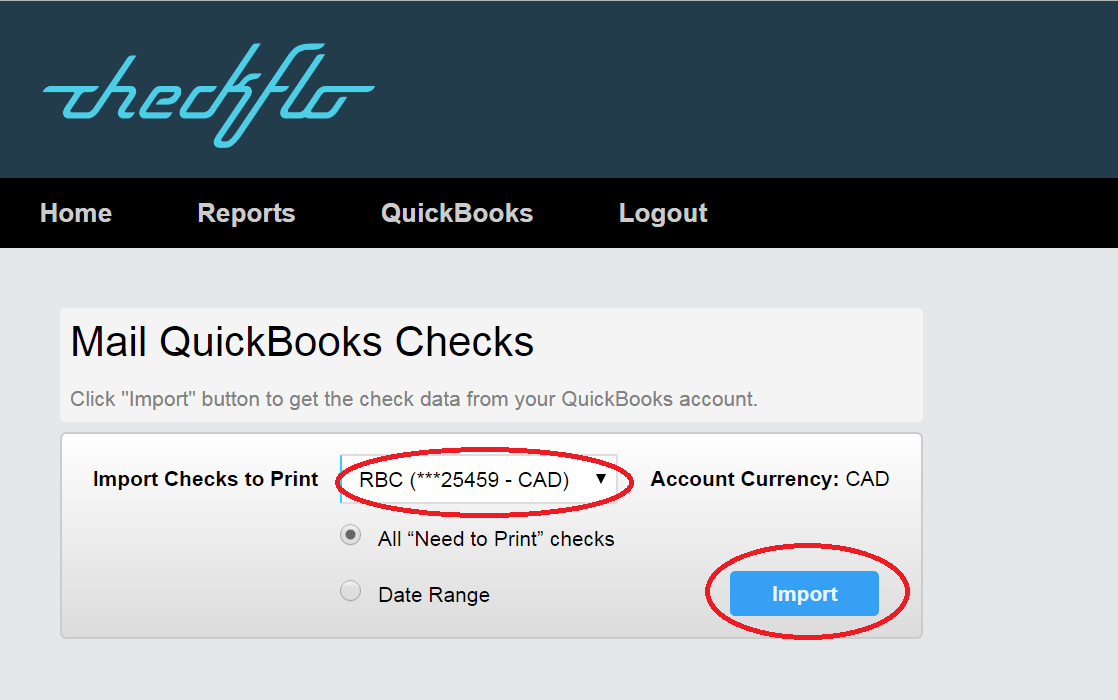
Step 5: Select Bank Account and Import
Choose the same bank account used for the check payments in Step 3 and click the “Import” button.
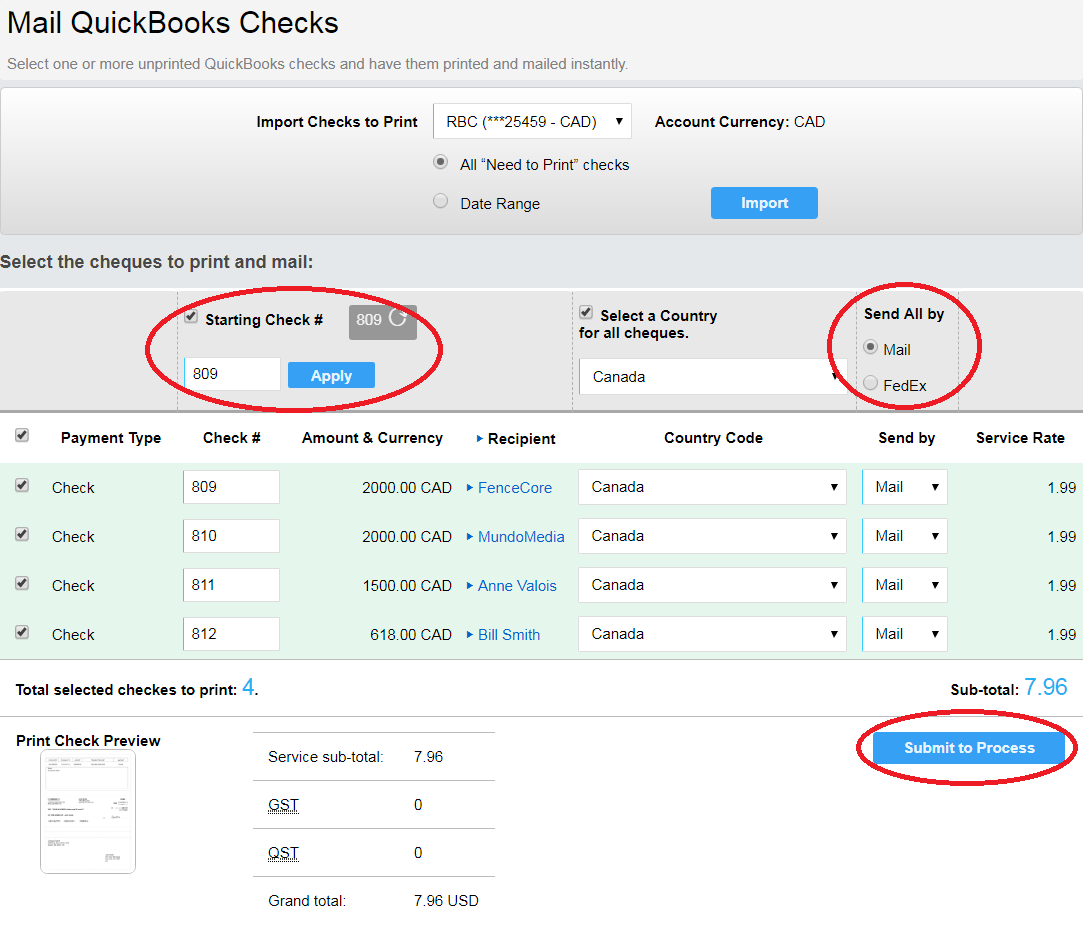
Step 6: Customize and Submit Checks
On the displayed screen, you can:
- Select all checks, then set starting check number.
- Choose the delivery method (Regular Mail or FedEx Priority Overnight).
- Click “Submit to Process” once you’re done.
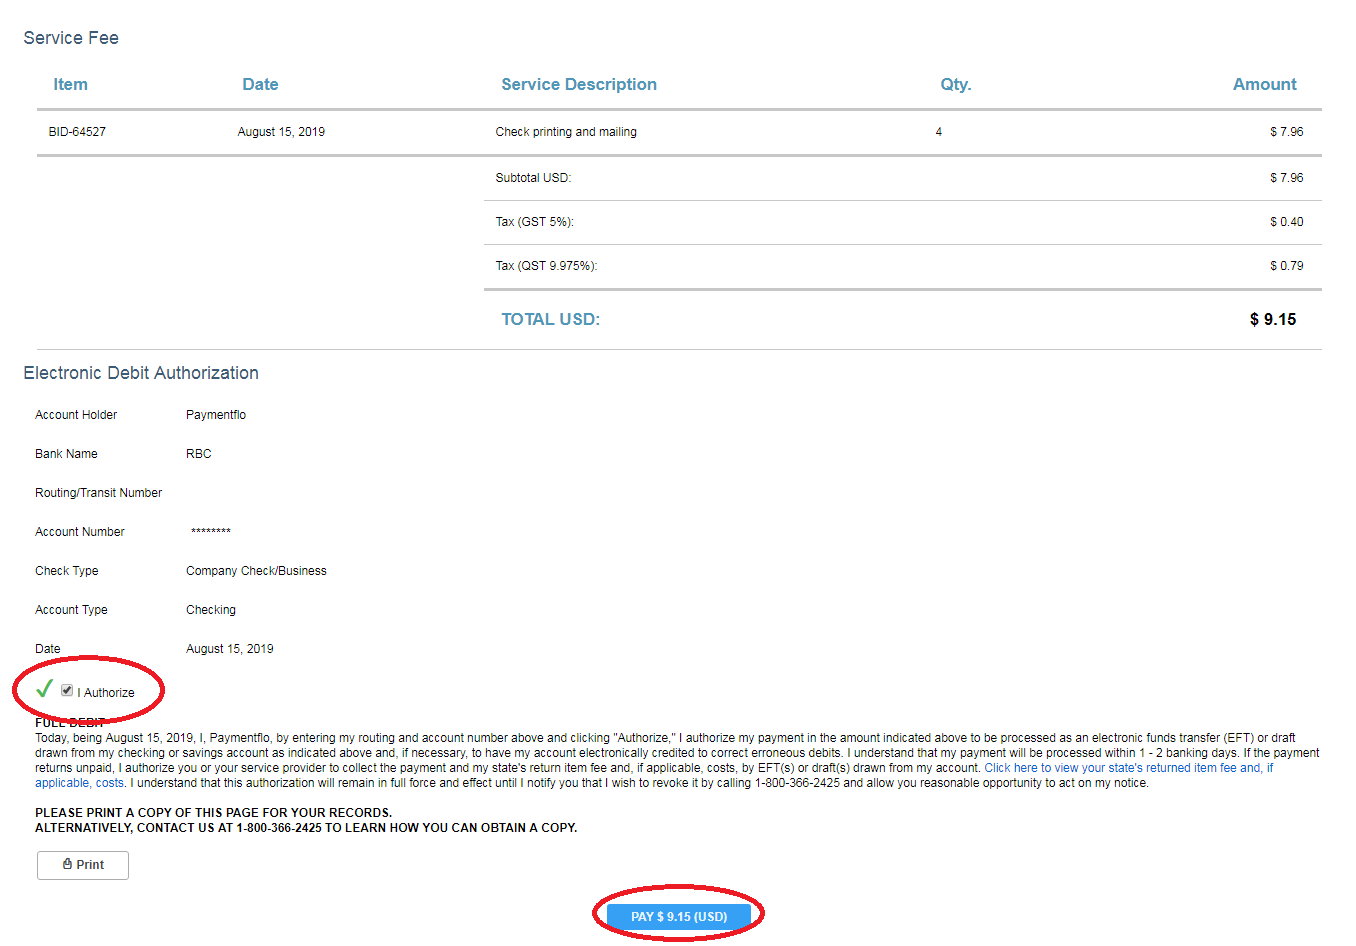
Step 7: Authorize Payment for Processing Fees
Authorize Checkflo to debit your bank account for the processing fees associated with printing and mailing the checks. After confirming the charges, click the “Pay” button to complete the transaction.